How to assemble the ESky CNC alloy head for King and Belt-CP. |
Parts required:
1. Main Blade Clamps
2. Alloy Rotor Head
3. Alloy Swash Plate
4. Alloy Washout Assembly |
 |
 |
 |
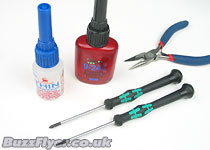
1. Firstly, you'll need a philips screwdriver and 1.5mm
allen driver. Also, thread lock and CA glue for use where neccesary.
|
|
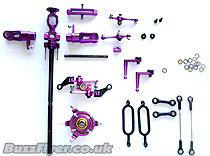
2. In addition to the alloy components you will need
the control linkages from your original rotor head. Its best to work
on a clean, clear surface. |
 |
|
 |
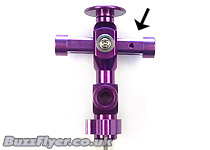
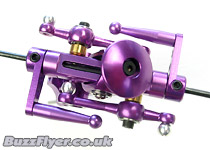
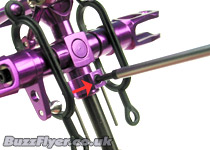
3. Insert the flybar holder through the head and attach
with the 2 silver screws. Use thread lock on these. Ensure the screw
hole is on the right side.
|
|
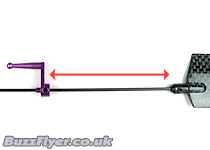
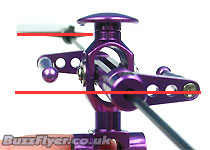
4. Screw and slide one of the alloy levers along your
flybar. The length between paddle and lever should be about 56-59mm
with the paddle fully screwed in.
|
 |
|
 |
5. Push the flybar through the flybar holder, attach
the other lever and paddle. Centralise everything and tighten - ensuring
the levers are level with the paddles.
|
|
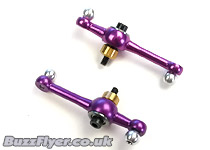
6. Assemble the components of the pitch levers...
|
 |
|
 |
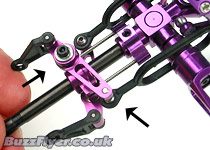
7. and attach them to the flybar holder in the direction
shown here.
|
|
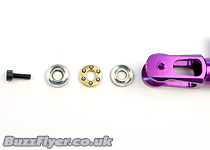
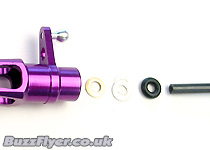
8. Assemble the bearings and washers as shown here, with the smaller holed washer on the inside.
|
 |
|
 |
9. The collared washer should have its raised edge towards the bearing. The spacer shim washer should be left out if the blade clamps don't move freely once tightened.
|
|
10. Insert the rubber o-rings and slide the shaft holder
into the head.
|
 |
|
 |
11. Pop the plastic linkages onto the levers and insert
the shaft through shaft holder. Attach the second blade clamp and tighten
both shaft end screws.
|
|
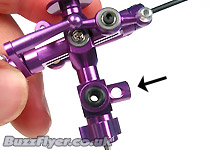
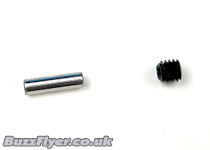
12. The head is fixed to the main shaft with a pin and
grub screw.
|
 |
|
 |
13. Insert the pin here, and fit the grub screw using
thread lock.
|
|
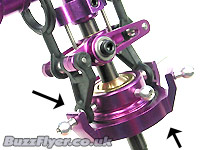
14. Slide the washout assembly up the main shaft and
onto the two locating pins.
|
 |
|
 |
15. Slide the swashplate up the shaft and attach to the
plastic washout linkages.
|
|
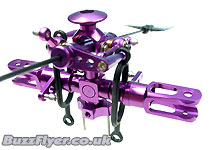
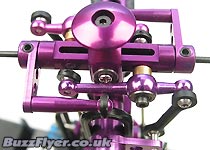
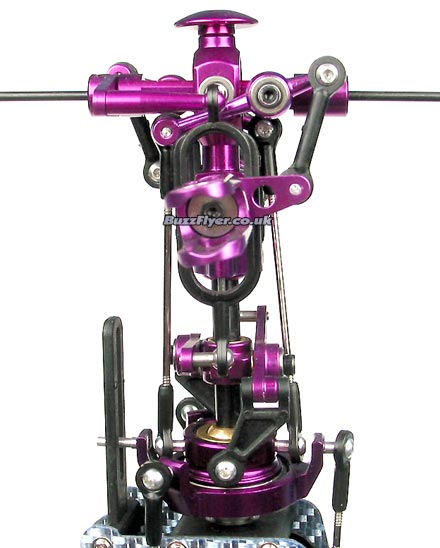
16. Finally connect the control linkages to the head,
as shown in these pictures.
|
Paddle side view:
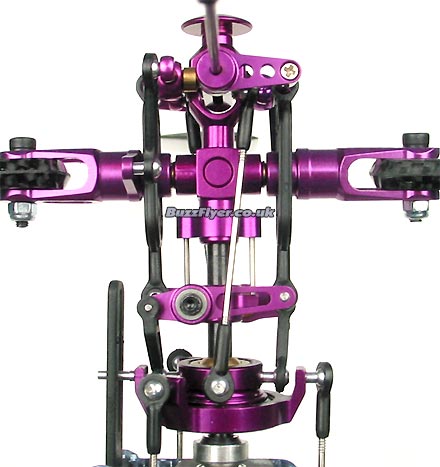
Blade side view:
|
|
When installing onto the heli; note it is important that all the parts are
free and do not bind. If this is the case, loosen where needed, making sure
thread lock is re-applied to secure the metal to metal bolts and screws.
If they bind, this will cause battery drain and possible damage to the servos.
I would recommend building the head onto a new main shaft - removing the
old shaft and head for use as a guide of direction and alignment.
Also note: you will have to re-setup the blade pitch once the installation
is complete.
|